
Installing SurfShark VPN On Kali Linux: The Authoritative Guide

8 - 15 min read
Aug 01, 2022

Virtual Private Networks (VPNs) were initially created to grant workers who are remote, workers who travel, or workers who do not tend to be in the office access to the local network over an insecure network connection when they are not physically within the local network. Essentially, a VPN can be used for various reasons however, the main purpose was for the use of businesses and companies.
Not only would workers need to access resources on the company network but companies with multiple offices that need to work in unison as if they’re on the same network found that a VPN would be the ultimate solution. Nowadays, daily computer users use VPNs for many different use cases but mainly, they want to maintain their privacy and better control access to resources. VPNs are used to guard daily users and companies alike against cyber criminals on public networks and are also used for hiding your IP address, your browsing activity, and your personal data on any network you may be connected to, whether it be at home or at a coffee shop. Ultimately, what mostly all VPNs have in common is the ability to connect remotely to a private network over a public connection. VPNs are used to secure internet connections, protect against malware and hacking, maintain digital privacy, gain access to geo-restricted content, and conceal users' physical locations. A VPN is an essential tool for staying safe and secure online as more and more users value their privacy, as well as companies with multiple offices and remote workers.
How Is A VPN Effective?
An effective VPN works by routing all your internet traffic through another computer, for all intents and purposes, it makes it appear that you are accessing resources on the Internet through that remote computer. This means that if you use the Internet with a VPN, the remote computer/server in which traffic is being routed becomes the source of data. With a VPN, not even your ISP or other third parties can see which websites you visit or the data you send and receive online. All your data traffic is routed through an encrypted virtual tunnel. An effective VPN connection is also secure against external attacks.
Using a VPN For Linux
As an increasing number of users switch to Linux for its security benefits, many VPN providers are ensuring that they support the platform. Users may have various reasons for implementing a VPN into their Linux systems, as we’ve stated prior, but let's review below:
- Accessing Geo-restricted content
- Keeping your web traffic secure on Public Networks
- Connecting to your home or work network to use the resources
- Use of Torrenting within Linux systems
- Cloak your IP Address and location to remain anonymous
When shopping for a Linux VPN service, it is important to make sure you consider ones that have a native Linux client. While Linux is typically thought to be safer than other operating systems such as Windows and macOS, there are some extra security benefits to utilizing a VPN; nonetheless, you should constantly consider: is this a good VPN or is this a good VPN for Linux? You should always analyze your options because a service may include the features you want, but not all provide a native Linux client. In addition to security features, you may want to investigate a VPN that supports several protocols, particularly Wireguard because it is built into the Linux kernel and is quite simple to configure. Furthermore, try to stick with VPN companies that instantly cut your Internet connection if you disconnect from the VPN, so you aren't sending data via an unencrypted network like at a coffee shop.
SurfShark! What is it?
A VPN for Linux is just as important as any other platform or device because as long as you’re on the internet, your information can be exposed and used maliciously without your consent. SurfShark, which can be downloaded here, is amongst one of the largest VPN providers throughout the entire world, with low costs and great OS compatibility. SurfShark provides lightning-fast connection speed and reliability, thousands of servers to choose from, and top-of-the-line encryption as well as multiple protocol support. More specifically, its support of Wireguard makes it a suitable choice for Linux. Surfshark does not log your traffic, provides AES-256 encryption, and has RAM-only servers meaning that these servers cannot store information past a period of time making it a solid, secure, and reliable VPN provider.
SurfShark Account Creation
Before anything else, we first need to create an account with SurfShark! Head over to this link Account Creation to create your account. After heading over to the link, you should be greeted with this screen:
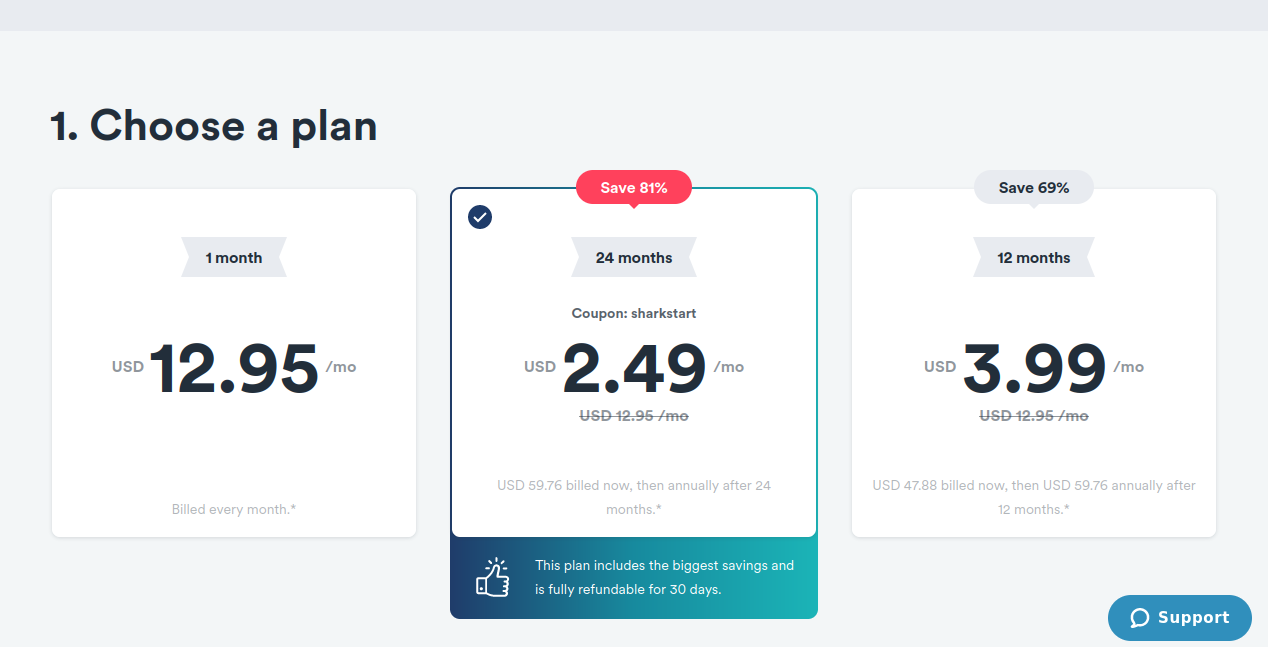
SurfShark is a paid service, so it only makes sense that you will be prompted to choose a plan. They offer a set of options ranging from 1 month, 12 months, and 24 months, each at different prices. To be completely honest, SurfShark's 24-month deal provides savings of up to 81% and it is a heck of a steal! Priced at $59.76 for 2 years, the other options will far exceed that cost over a 2-year span. Ultimately, you choose the plan that suits you best, especially if you are new to the service and are just testing the waters.
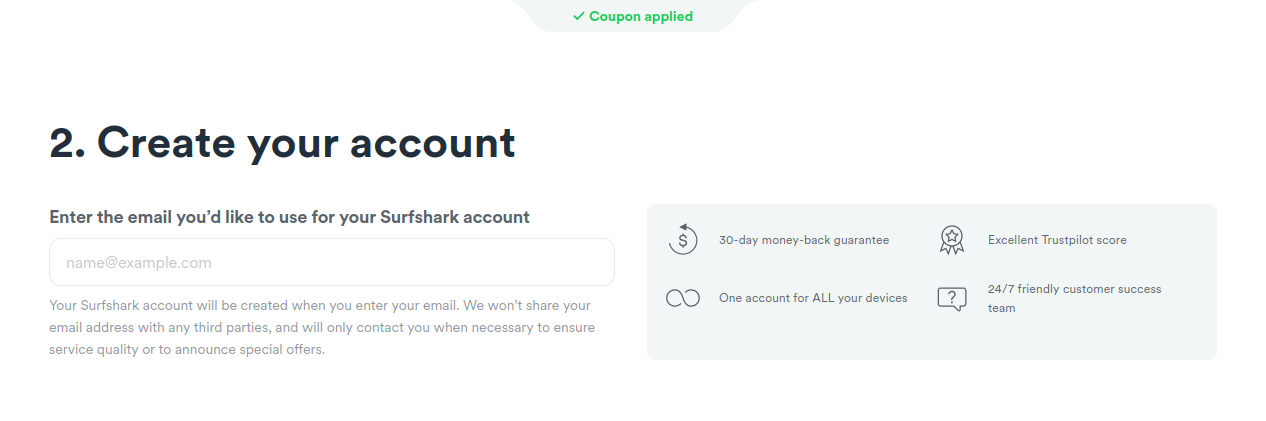
After selecting a plan, this step is fairly self-explanatory. Enter the email address you would like to associate with your VPN account. Your SurfShark account is created on the spot and no email verification is required. SurfShark also provides a 30-day-money-back guarantee if you feel that their VPN is not for you.

Once you choose a plan and enter your email, you can also add any additional features you’d like to include into your account. Not only is SurfShark an excellent VPN, but they take security very seriously by also providing us with an antivirus, an alert tool that will send alerts if your information has been leaked or compromised, and a search function that will allow you to surf the web in complete privacy with no ads or tracking on top of the privacy you receive from their VPN. This step is of course optional and is by no means required but it is a nice gesture.
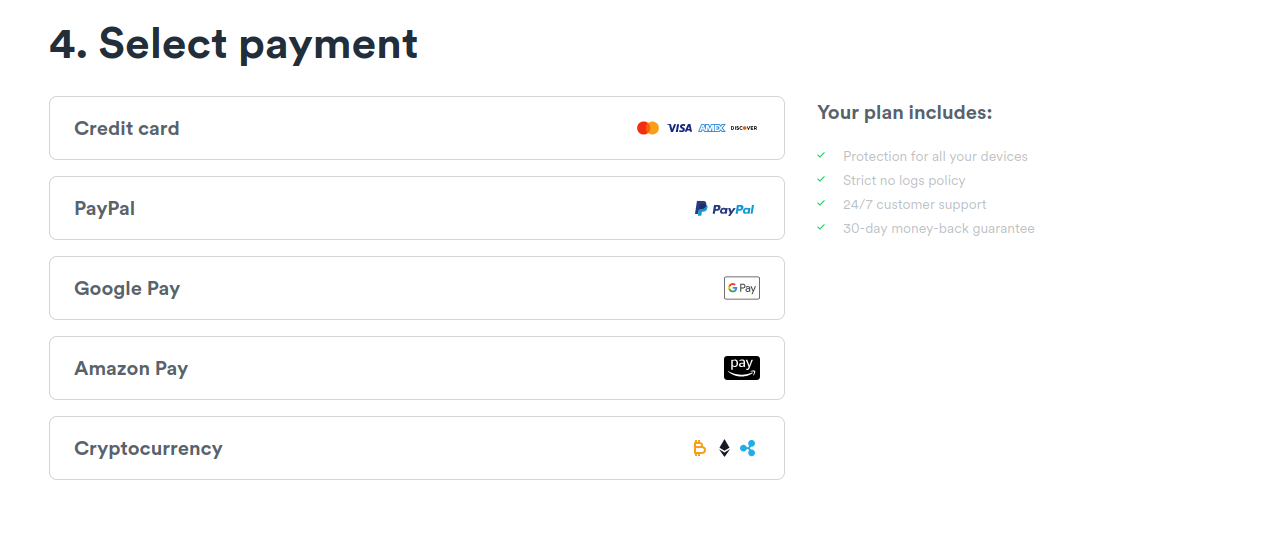
Finally, after selecting all the previous options, you will be prompted to provide payment. After these short 4 steps, your account should be up and ready to use!
Installing SurfShark VPN on Kali
A VPN on Kali Linux is not installed and enabled by default, leaving you with a grayed-out VPN option and a complex set-up process if you don’t know how to install a VPN. This article will explore the reasons why installing a VPN on Kali Linux is a necessity, and how it can help keep you protected. Nowadays, for most operating systems, the easiest way to set up a VPN client is by using the provider's custom software, however, only a few VPN providers offer a custom Linux GUI client. For Kali Linux, it is, unfortunately, the former and not the latter, so you will have to install and run SurfShark from the Command Line. Below, we will show you how to install SurfShark for Kali Linux via the command line:
Command Line/Terminal Installation:
Step 1:
Let’s run the command below to update all of our packages:
|
$ sudo apt-get update |
Step 2:
When it comes to retrieving the link from SurfSharks website, the release version may be different depending on the time of the download. The link below is a general link that will update whenever a new version is released:
Or you can use the following link below, download SurfShark, and afterward, change to the directory in which the file downloads:
For our installation process, we will be using the first link:
For our instance, this is the most up-to-date version link. Let us open terminal and run the command below:
|
$ sudo wget |
Install the file that was created with the command below:
|
$ sudo dpkg -i surfshark-release_1.0.0-2_amd64.deb |
Let us install SurfShark now by running the command below. Being that I have SurfShark installed already, your output might differ:
|
$ sudo apt-get install surfshark-vpn |
Let us connect toSurfSharkhark now by running the command below:
|
$ sudo surfshark-vpn |
After running the command above, if you are using SurfShark for the first time, especially this way, you will be prompted to enter your email and password. In our instance here, we have done just that as shown below:
|
┌──(kali㉿kali)-[~] |
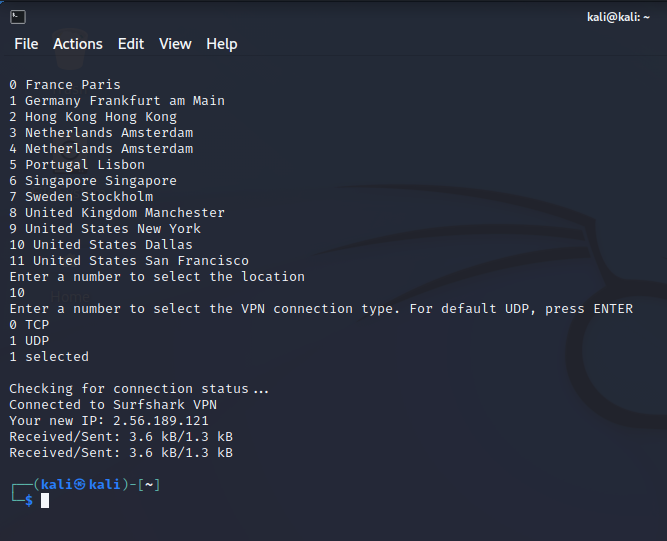
After entering your account email and password, you should be greeted with the screen below:
|
0 Albania Tirana |
This is a list of servers or locations to which you can connect to. You can keep pressing enter to continue flipping through the list of locations. Once you have gone through the list, keep the number associated with the location in mind.
|
Enter a number to select the location |
For this example, we are currently located on the east coast and we will connect to location 127, which is Los Angeles, California. After selecting a location number, they also prompt you for a connection type. For this example, we will use TCP. After selecting that, we should be greeted with the following screen:
|
Checking for connection status... |
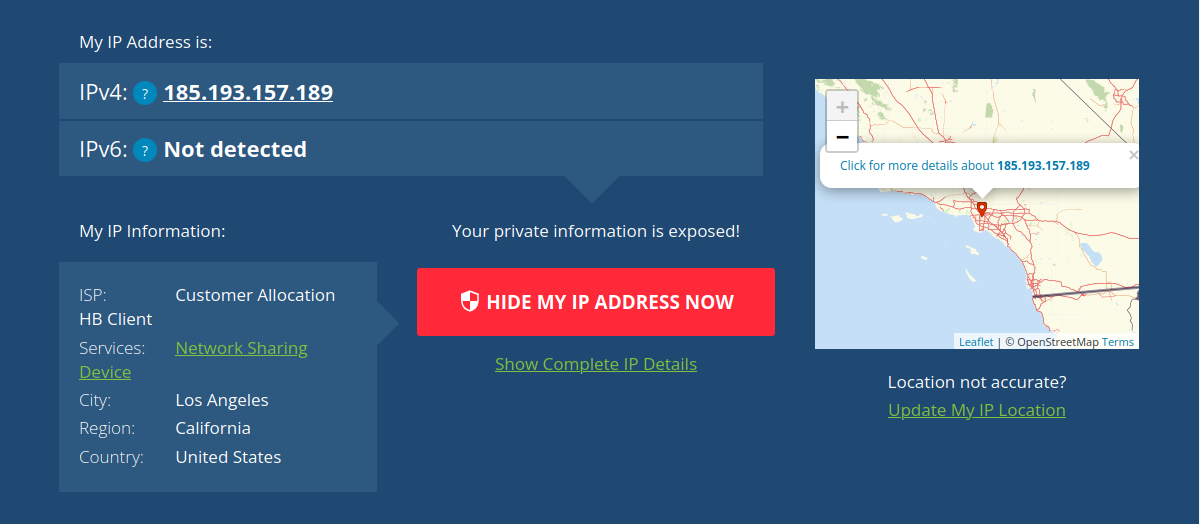
You should be finally connected! If we look up our public IP address as well, using the website / we can see it has changed as shown below:
Speedtest:
Let's run a quick speed test to test our connection. For this instance, I will be using speedtest-cli, a command line tool for testing internet connection speed. To install this on your system and run tests for yourself, run the command
|
$ sudo apt-get install speedtest-cli |
After running that command and installing speedtest-cli, you should be all set! Run the command speedtest-cli to launch the tool as shown:
|
┌──(kali㉿kali)-[~] |
As you can see, I am at about 306 Mbps upload and 250 download speed! Now let's connect to the VPN by running the command sudo surfshark-vpn.
|
Enter a number to select the location |
You can see here that I am now connected to location 127, which is Los Angeles. I will now run speedtest CLI to see how my internet speed holds up:
|
┌──(kali㉿kali)-[~] |
After running the speedtest, you can see that my internet speed did lower a bit. However, being that I am on the east coast and Los Angeles is on the complete other side of the US, the speed is still very much viable. The difference is not that drastic and I almost felt no change. Now, as for the public IP, there is no need to worry. Each time you connect to surfshark, you are dynamically assigned a different IP each time, no matter if you connect to the same location.
Additional Commands:
| >
┌──(kali㉿kali)-[~]
|
Run the surfshark-vpn help command to pull up additional arguments you should be able to pass through!
Below is an example of the attack argument. It does not prompt you for a list but rather connects you to the nearest server.
|
┌──(kali㉿kali)-[~] |
After running a quick speed test, we can see that my connection speed hasn’t changed that much and is still very fast considering ping and distance.
|
┌──(kali㉿kali)-[~] |
Below is an example of the multi-argument. It bounces your connection between 2 servers. Run the command sudo surfshark-vpn multi as shown below:
|
┌──(kali㉿kali)-[~] |
Once you run the command above, you should be greeted with the screen below:
Essentially what you are doing here is selecting the final destination server. With the CLI version of SurfShark, we are limited in options. However, behind the scenes, it is doing all the work. Our connection bounces from our router to a server and then once more to the server of our choosing. For this example, I choose Dallas.

As we can see above, my public IP shows up as if I am in Dallas. If we look below, we also did a speed test on our connection.
|
┌──(kali㉿kali)-[~] |
We can see that my connection speed has changed tremendously, however, it is still quick enough and when you consider things like distance from the actual server, ping time, and my own connection speed, this is understandable but still very viable.
Things to Look Out For
Although you might think that using a VPN will make you untraceable, there is still a way that you can be tracked with a VPN. It is much harder to track but nonetheless, can still be done. For example, whether you use a VPN or not, advertisers may track you across the internet via cookies. Other things such as your digital footprint can also be tracked. Fingerprinting creates a digital portrait of you by using your computer settings, software, web browser preferences, and other comparable items.
Now there is also the question of WHO can track you. Well for once, your ISP! Your ISP gives you access to the internet so they can see the connections you make through their servers. Additionally, malicious hackers, or cyber criminals, can see that you’re using a VPN if they try to access your data through an unsecured network. Of course, there are a few people who are able to see what you can do but of course, it will take them a long time and if you aren’t doing anything illegal, then there is nothing to worry about.
The Bottom Line
The best VPN for Kali Linux is dependent upon many factors, but major considerations include security, accessibility, dependability, and speed. At the end of the day, it all comes down to what you intend to do, the network you intend to connect to, and how essential your privacy is to you. Installing a VPN will dramatically strengthen your system security and reduce the possibility of attackers, ISPs, and government agencies alike gaining access to your data. Keeping your web traffic secure on public networks, connecting to your home or work network to use their resources, the use of torrenting, and just staying anonymous may just be some of the reasons why you need a VPN for Kali Linux. Many of us who value privacy may consider utilizing a VPN to decrease the amount of information about our online behavior that is shared. This level of secrecy and anonymity can make a VPN worthwhile and that is exactly why SurfShark is amongst one of our best here at LinuxSecurity and amongst one of the best globally!


