
Complete Guide to Installing Security Updates in Debian & Ubuntu

7 - 13 min read
Jul 12, 2021
Whether you are a DevSecOps engineer responsible for managing your organization’s application infrastructure or you have your own personal Linux server that you use at home, the importance of keeping your systems safe and secure against malicious attacks by bad actors cannot be over emphasized.
While there are many aspects with regards to securing systems, one fundamental best practice is to continuously patch your systems and applications as soon as they are made available. The infamous WannaCry ransomware attack from the summer of 2017, that caused much grief to millions of users is a case in point. While the patch was made available much ahead of the actual attack, it was due to a sheer lack of security discipline that the attack was successful.
“While Microsoft had released patches previously to close the exploit, much of WannaCry's spread was from organizations that had not applied these or were using older Windows systems that were past their end-of-life. These patches are imperative to an organization's cyber-security, but many were not applied because of needing 24/7 operation, risking having applications that used to work break, inconvenience, or other reasons.” (Source: WannaCry ransomware attack - Wikipedia)
This article will walk you through specific steps you need to patch your Ubuntu and Debian based systems for operating system packages. We shall cover the basics of commands you need to execute through the CLI and through the GUI. We shall also cover some additional tips and techniques for automation, package conflict resolution, kernel patches and how to manage docker/container-based security updates.
How Can I Update Ubuntu via the Command-Line?
Most programmers prefer the command line or programmatic execution of commands. This method is quicker, you have better control, and the commands can be easily incorporated into scripts that can be setup for regular execution through automation. If you are new to the topic, the Ubuntu command manuals is a good place to get started.
The commands we shall cover pertaining to this topic are:
- apt update: This command only fetches the information on latest packages that can be upgraded. Note that it does not actually upgrade any packages on the system, only refreshes the index local to the system. This package information is obtained from standard official sources and then stored locally on the system. If ever you need to check from which sources the package information gets picked, you will see it in under /etc/apt/sources.list on the system.
- apt list –upgradable: This command will then display the packages that have updates available and therefore can be upgraded on the system. This information is based on the information fetched previously from the update command
- apt upgrade: This is the actual command that does the upgrade of the packages in the system. Once executed, the OS will be successfully upgraded. Note that this command can install new packages if the dependencies require it, but it will never remove packages.
- apt full-upgrade: This command does a little more than what the upgrade command does. In addition to upgrading new packages and installing new packages as required, it also removes existing installed packages if it determines that the dependencies are no longer required. Use this option with caution as it can cause unexpected system behavior if your application is dependent on a specific version of the package.
- apt autoremove: This command is used to remove unused packages which are no longer needed by the dependent packages. This can be executed after apt upgrade
Note that all of this discussion is with respect to packages that are already on the system. If you need new packages that are not already there, you need to use the apt install command.
As you research and look for commands on upgrading, you will come across apt-get commands with similar options of upgrade/update etc. So, what should you use and what is the difference? Both are package management command line tools and there is a bit of history as to how the command evolved over the years. The apt CLI is the more recent (made available since Ubuntu 18.04 and Debian 10), preferred and the officially recommended tool. It is clearer in explaining what exactly it is doing, the options that come with apt are considered to be more user friendly and covers the range of frequently used options for the average user. The apt-get CLI, on the other hand, is more low level and contains a lot more options that are for the advanced user.
So how does one typically sequence these commands? Once you are comfortable with what each of these does, you can combine them together into a single command that can be set up for automated regular execution. More about that in later sections.
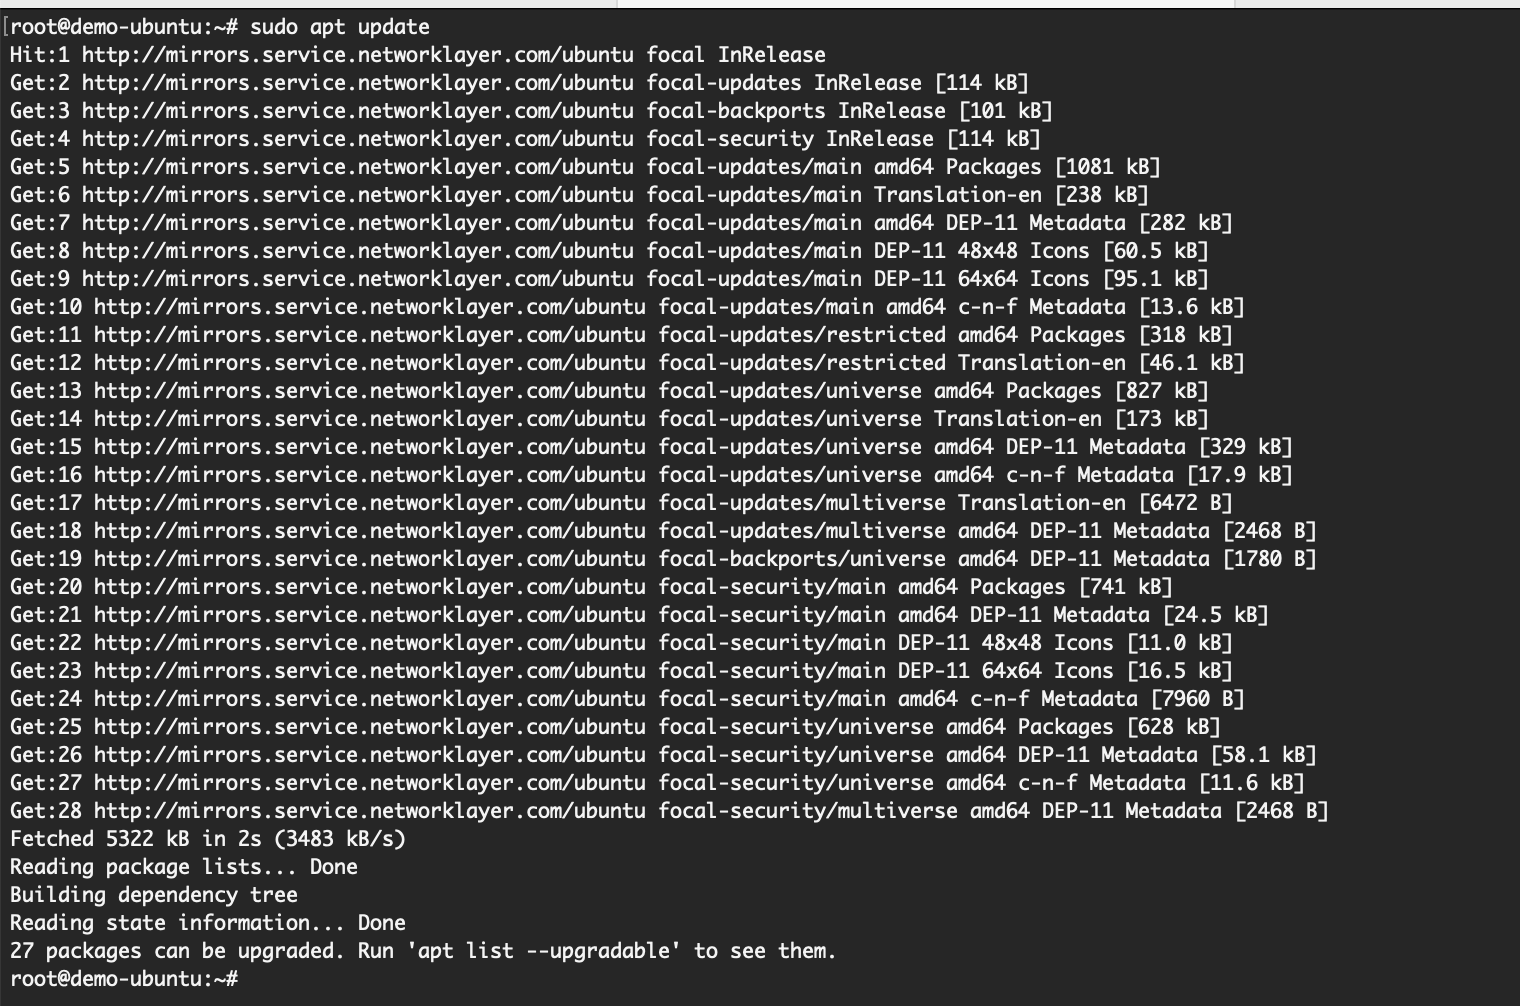
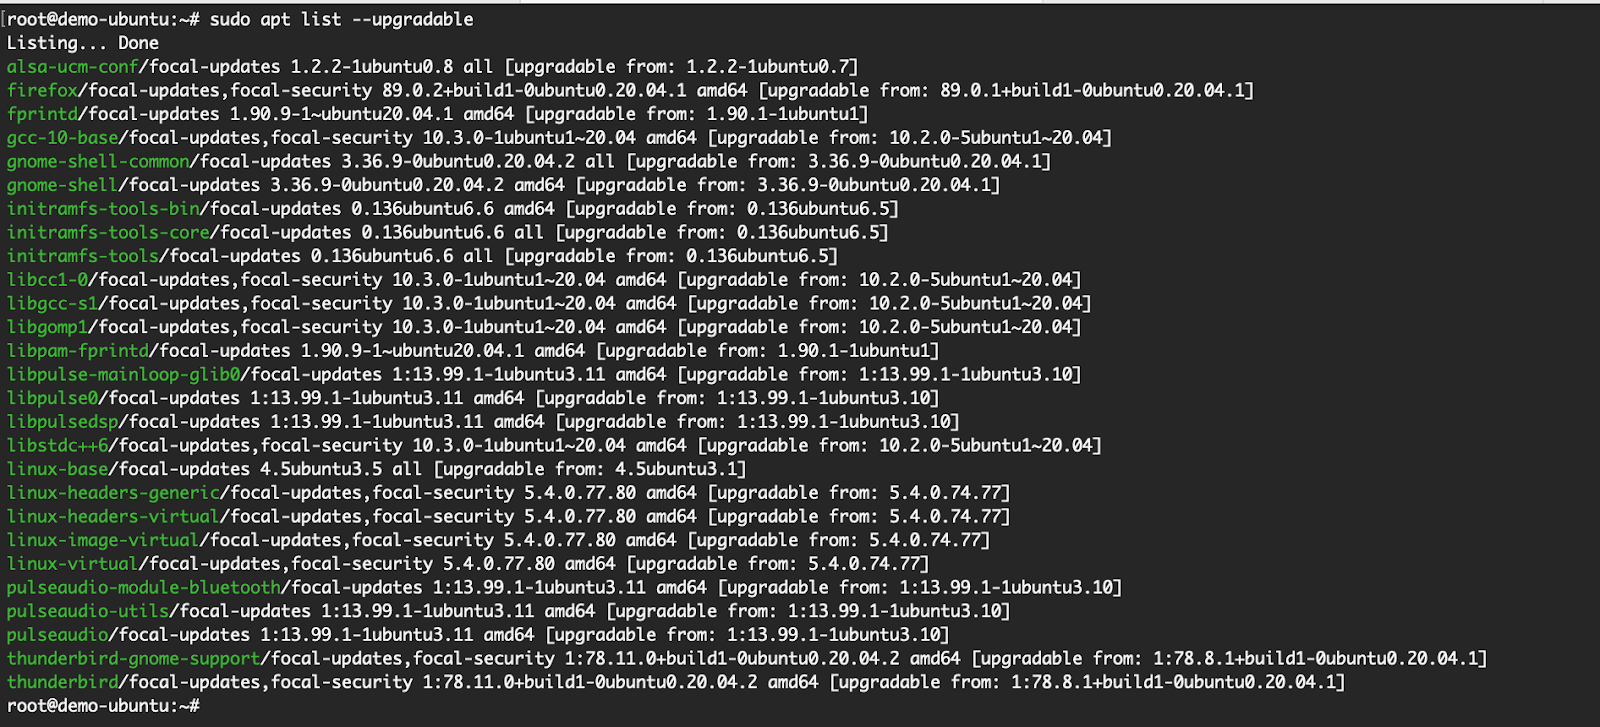
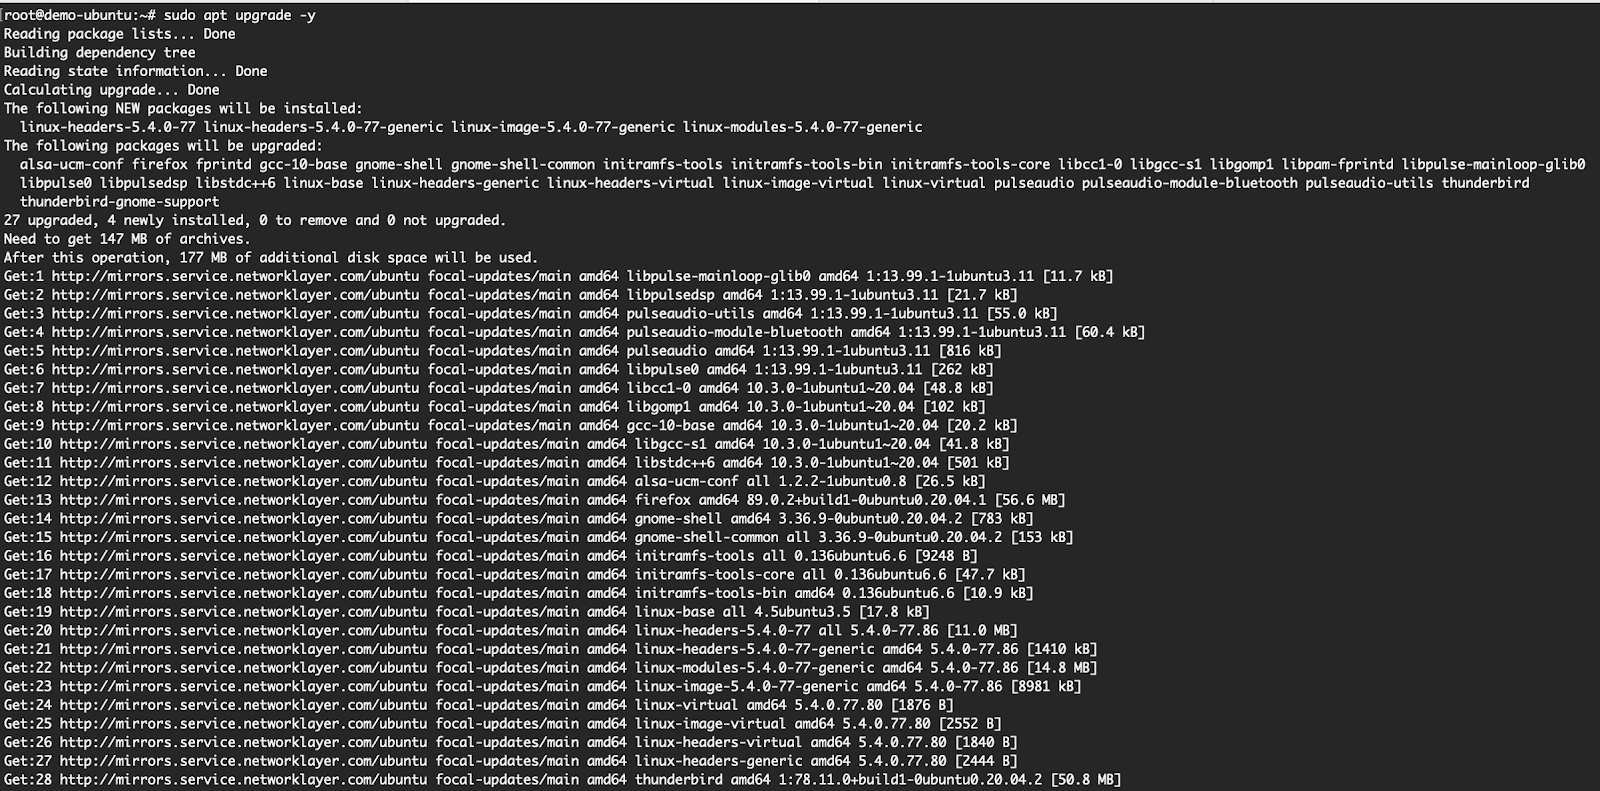
Here are a couple of screen captures to illustrate what you would see for some of the above commands.
apt update: Here you can see the various ubuntu sources that it is fetching the package information from.
apt list –upgradable: Here you can see, that from that list of package information fetched from earlier step, the packages that are having new versions and can be upgraded:
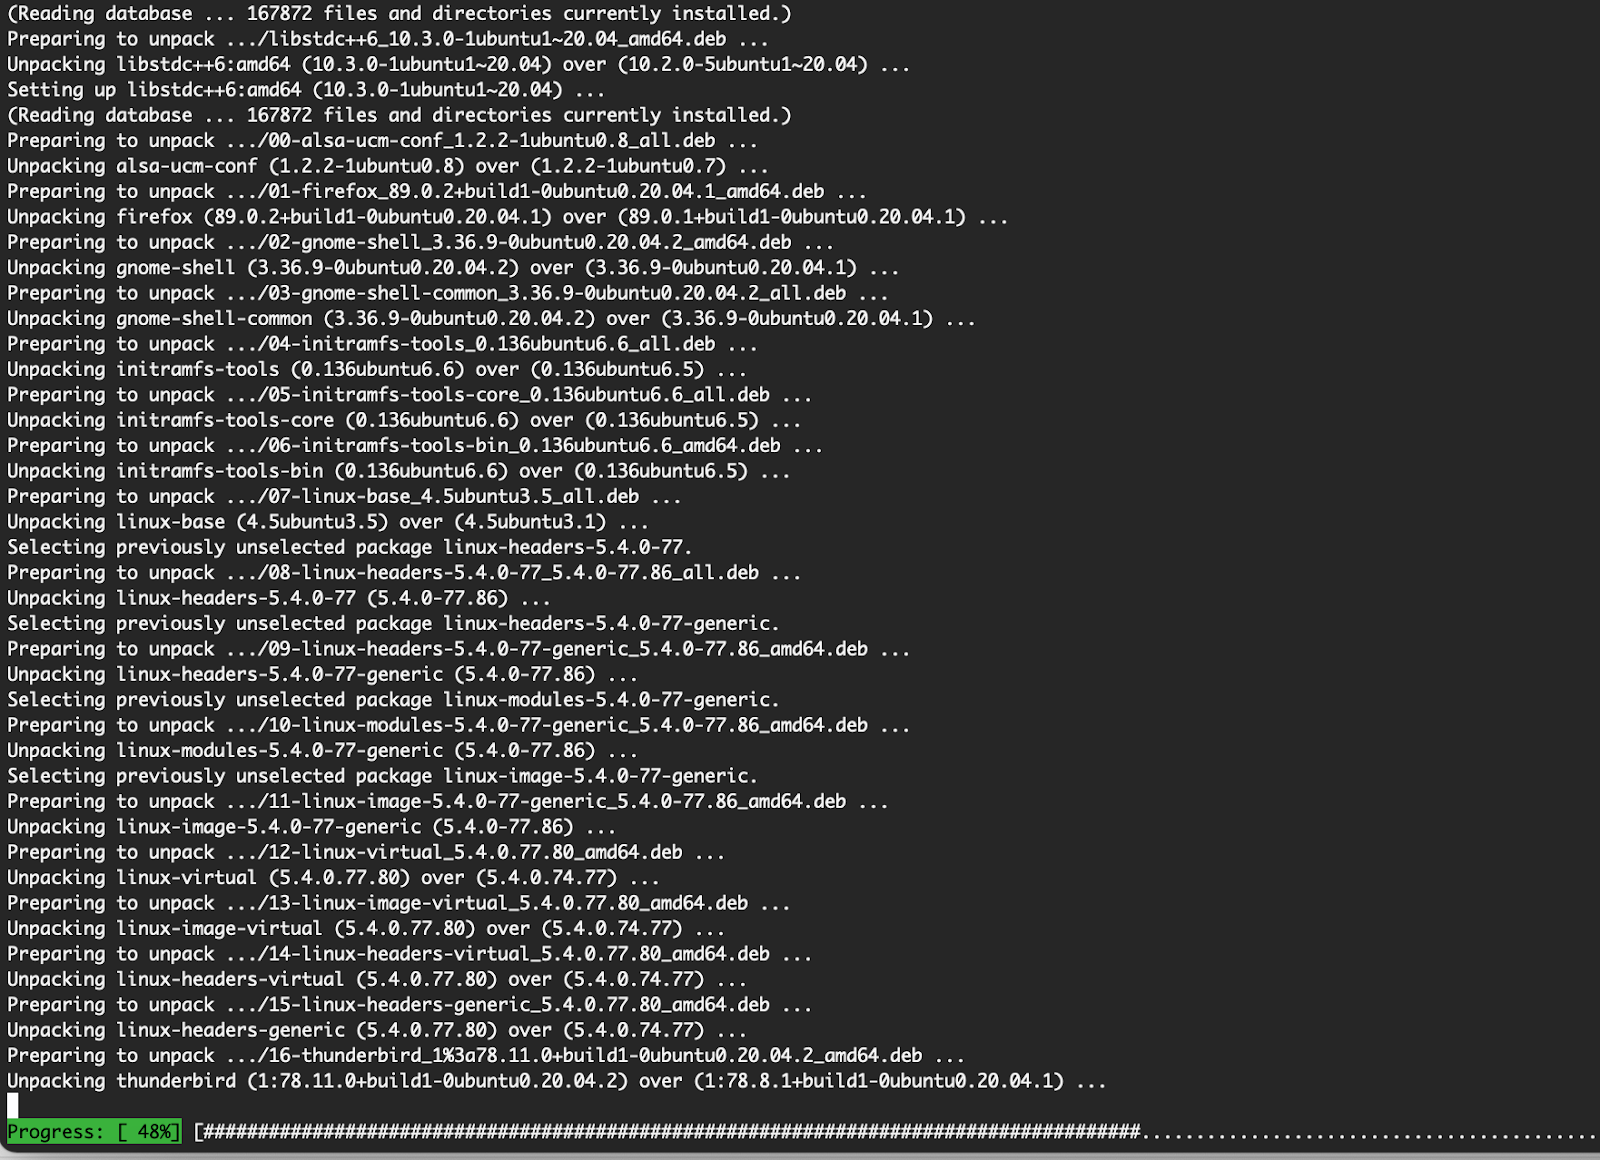
apt upgrade -y: This command upgrades all the packages from the previous step and shows a neat progress bar as it proceeds. The -y option installs it silently without you having to prompt again. (Side Note: This is one example of how the apt is more user- friendly than the apt-get. You would not see the progress bar in the apt-get).
How Can I Update Ubuntu via the GUI?
Some users may prefer the UI way of upgrading packages as it gives neat visual steps that tells you details of the packages that makes easy reading and unlike the CLI, prompts you that a restart of the system is required after install (if needed). The GUI way of upgrading is easy to do if you have only one or two systems to manage, personal installations and only on systems which have gnome or alternative desktop available.
In the above section, we had installed Ubuntu Desktop and connected to the system using a VNC Server/VNC viewer. Depending on your system - there are many different ways to get to the GUI.
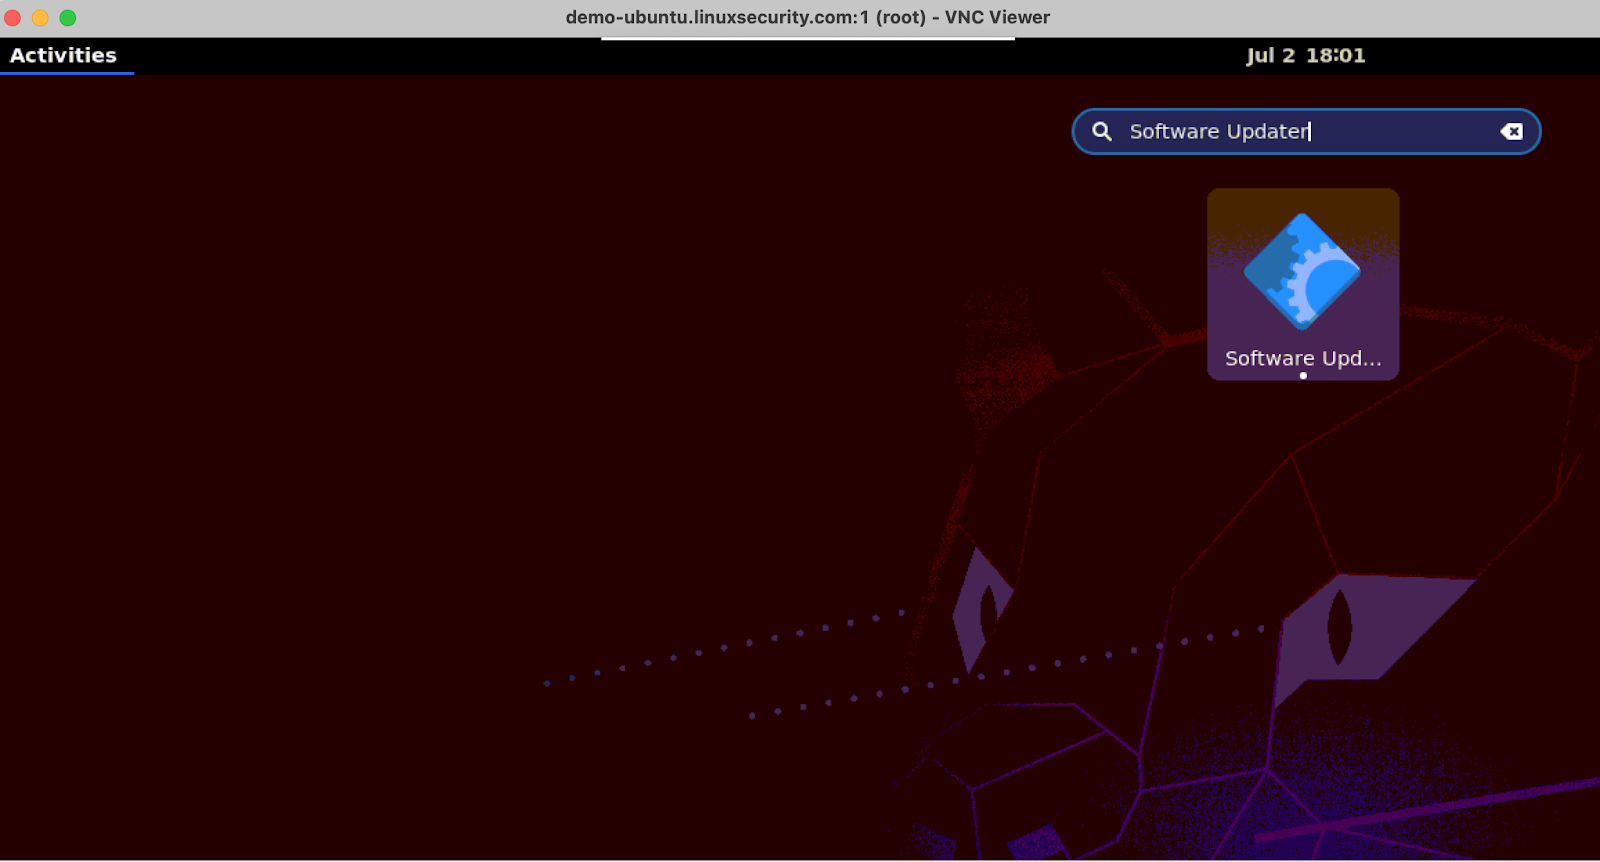
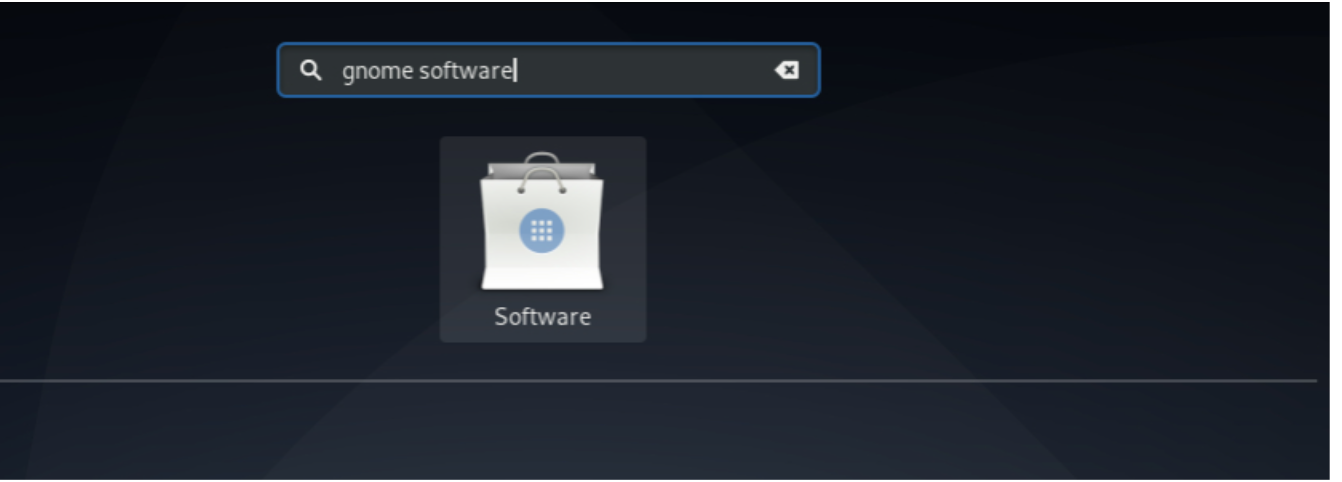
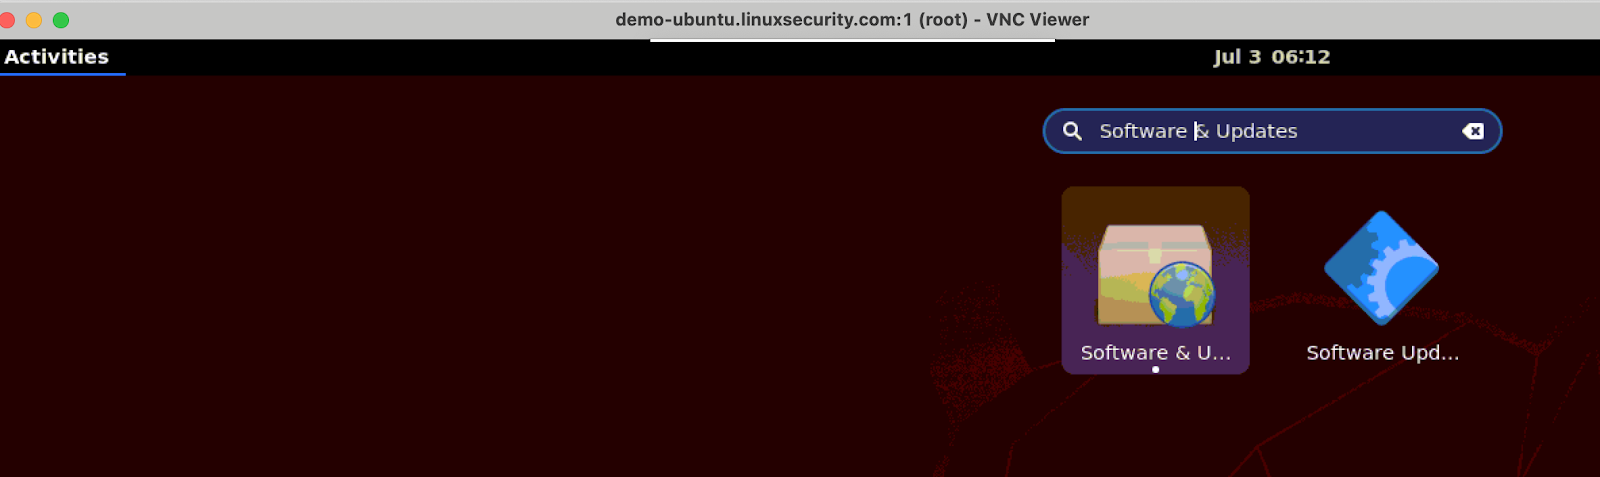
To upgrade via GUI, open the Ubuntu “Activities” folder and search for the “Software Updater”
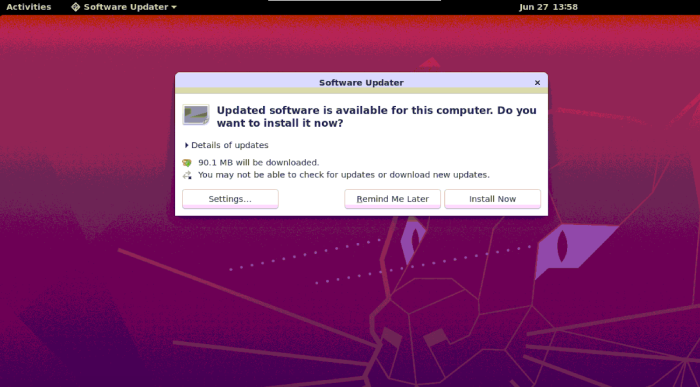
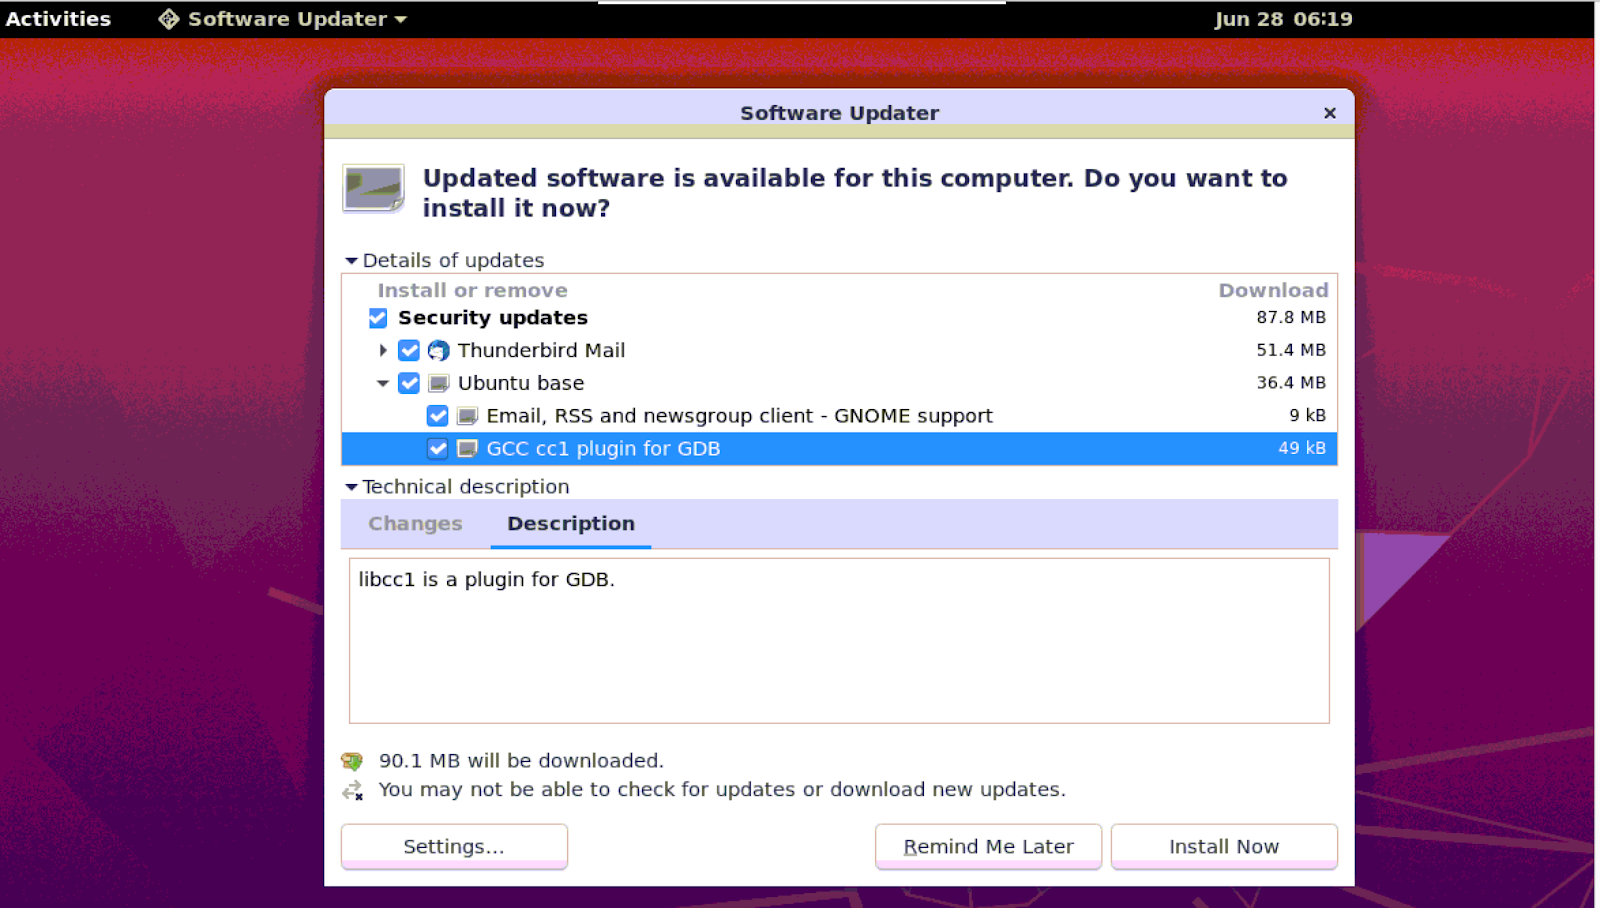
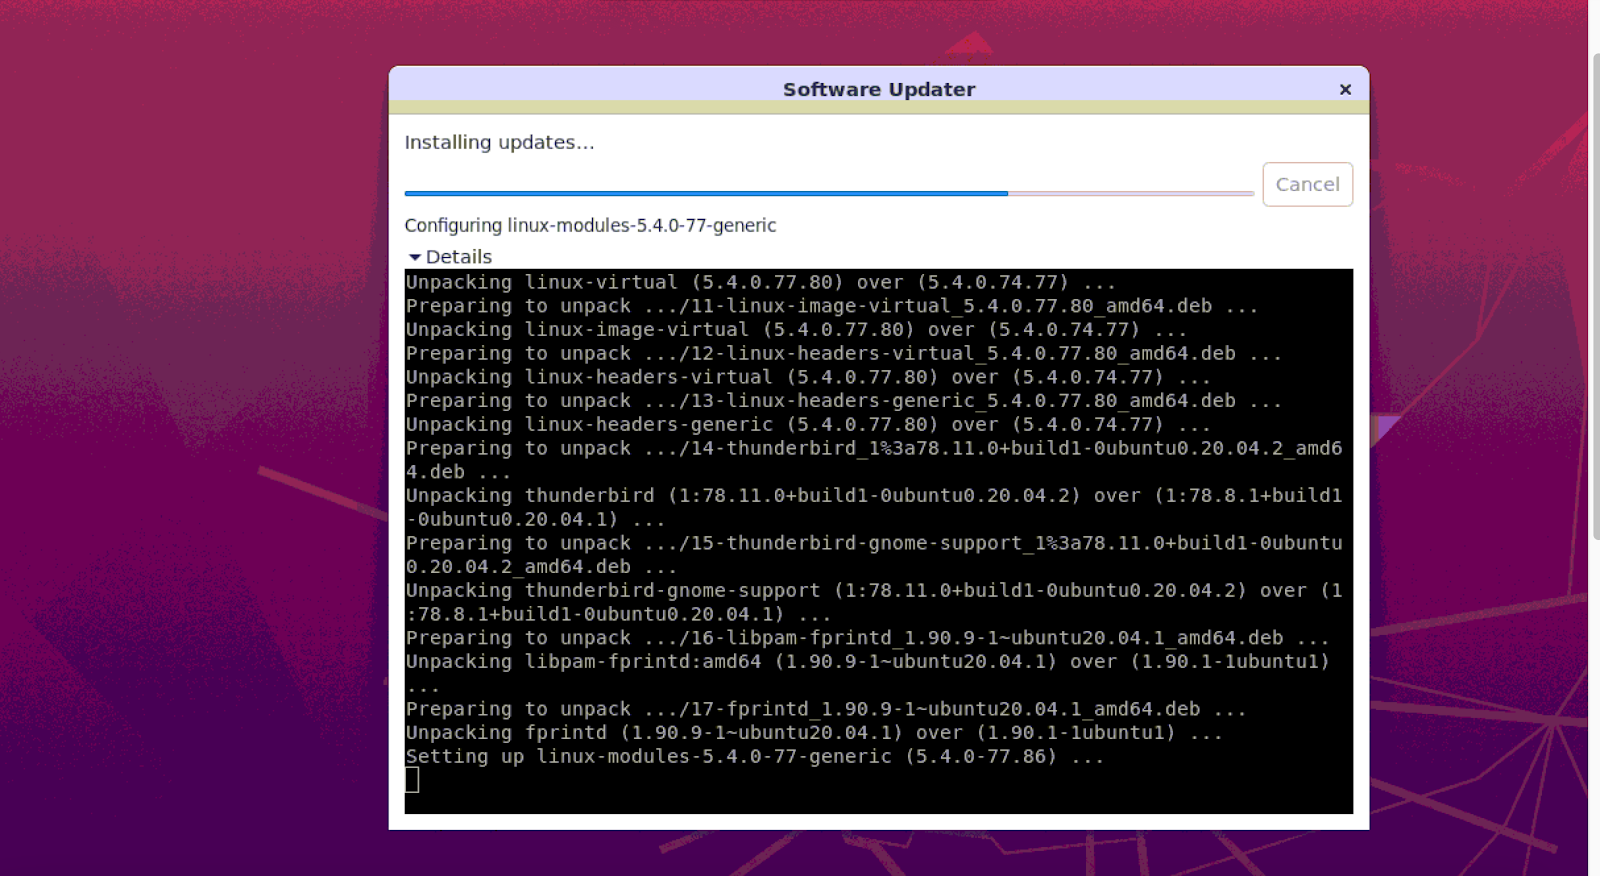
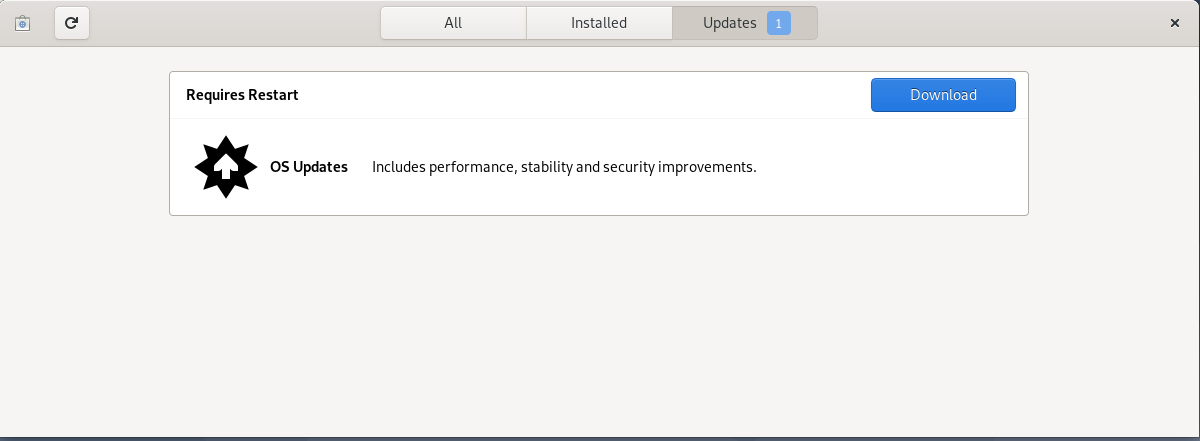
Click on Details twisty to check the listing and description of the packages that will get upgraded. A dialogue box will appear to ask you for permission to install the updates right now or later. You can also use the checkbox selector to check/uncheck the packages that you want to install. (The equivalent of this in the CLI is to upgrade only the required package instead of a general upgrade on all packages).
Click “Install Now” to begin the installation.
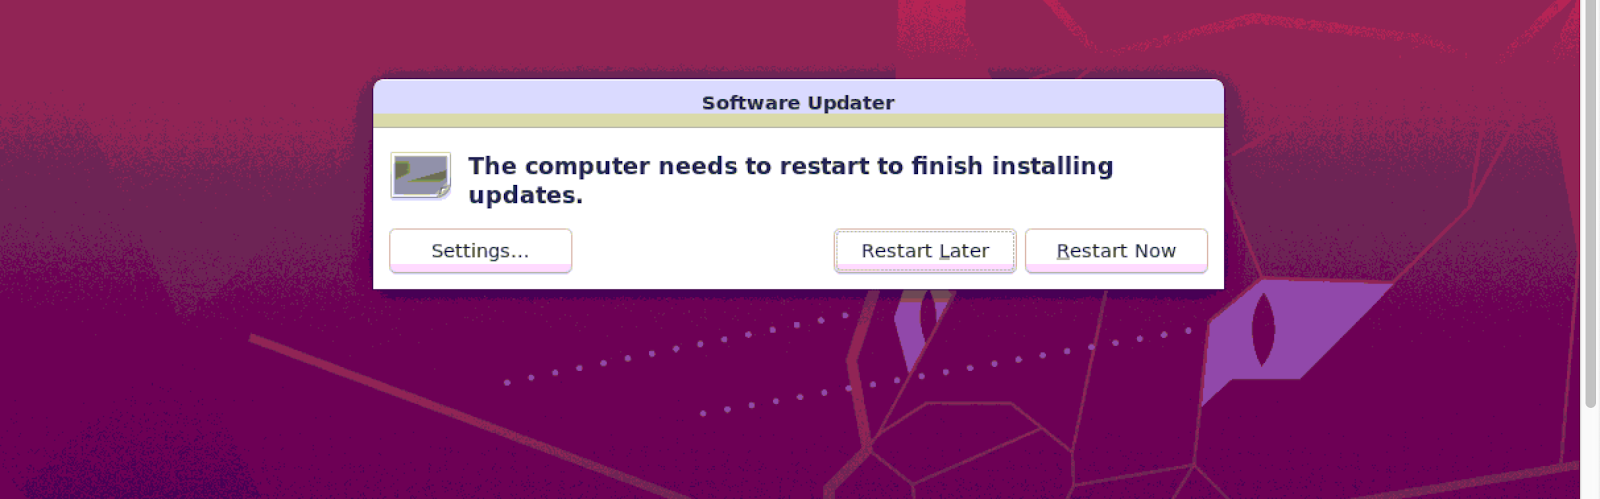
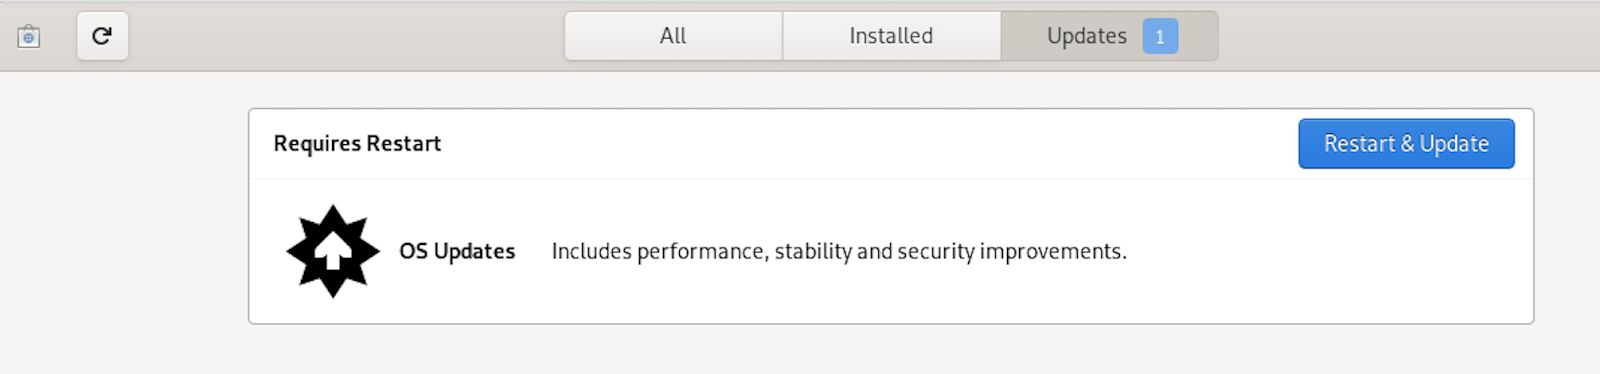
Once the updated version of Ubuntu and the updated packages are installed on your system, a window may appear asking you to restart your system in order for the changes to take effect.
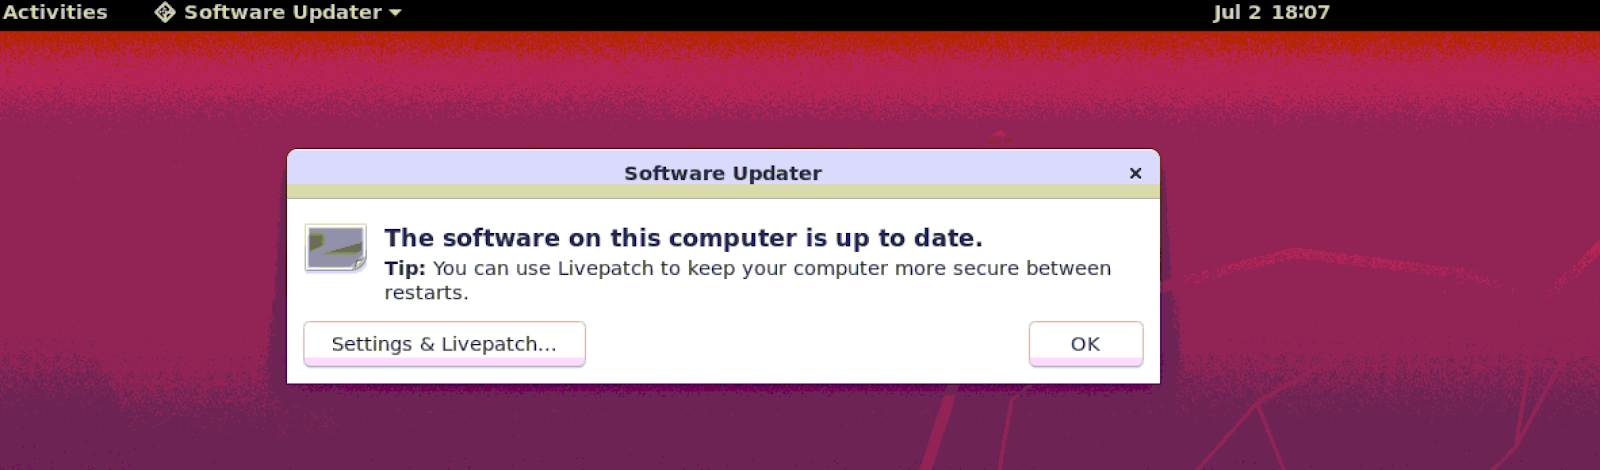
And after restart, you get confirmation that the computer is up to date!
Update Debian via the CLI
Updating Debian via CLI uses the exact same set of commands as already demonstrated in the Ubuntu section. Ubuntu is the newer operating system based on the older Debian. They are very similar in many aspects and in the context of this article, the same commands for upgrade can be used.
Update Debian via the GUI
In this section, we used the GNOME Desktop that came with the default installation of Debian 10. Depending on your system setup, there may be several ways of getting to the GUI.
So, to get started for upgrades, press the “Super key” on your keyboard. (It is a key with Windows logo if you are on a Windows machine. If it is an Apple keyboard it is the Command key.) Type "gnome-software" and click on the software icon.
Click on the Updates tab on the popup as shown in the image. If there are updates available, it will show here. Click on Download.
Next, it will prompt you for update and restart.

Once updated and rebooted you will see a confirmation as below.
Extras & Tips
How to block upgrades on specific packages
Sometimes, there is a need to block specific packages from getting upgraded as your application may have some dependencies on the specific version and upgrading it may have a detrimental effect on the application behaviour. You still want to upgrade all other packages in the system except those specific packages. This is where the apt mark hold and apt mark unhold commands will come in handy. In the example below, we do not want to upgrade the Jenkins package as it will break the Jenkins jobs running, so we hold back its upgrade.
apt-mark hold jenkins
apt update -y
apt upgrade -y
Later when you are ready to upgrade the package, you can execute the following:
apt-mark unhold jenkins
apt update -y
apt upgrade -y
How to perform a dry run to test the configuration
As the name suggests, this parameter that can be combined with (most of) the apt commands, is very useful when you want to check what would happen if you executed an upgrade, without actually running it. So, from the following output, it lays out what would happen: that one new package will be installed, one package will not be upgraded, and a few packages will be upgraded. This lets you do a quick sanity check to see if this is what you really want.
apt full-upgrade --dry-run
Reading package lists... Done
Building dependency tree
Reading state information... Done
Calculating upgrade... Done
The following NEW packages will be installed:
libzstd1
The following packages have been kept back:
logdna-agent
The following packages will be upgraded:
apt dpkg libapt-pkg5.0
3 upgraded, 1 newly installed, 0 to remove and 1 not upgraded.
Managing kernels that build up in the system over a period of time
A special note should be mentioned regarding kernel upgrades. Every time you upgrade a kernel, a new version of the kernel gets installed. Over a period of time, these kernels can accumulate on the system and consume significant disk space. Whenever a new kernel gets installed as part of the upgrade, you can clean up the old ones. As a best practice you can keep three kernels, the current active one plus two old ones – so that you can fall back to the old one if needed. The Debian package “byobu” has a script “purge-old-kernels” that can be used for this purpose.
apt install byobu
purge-old-kernels --keep 3
You can learn more purge old kernels.
To see all the kernels installed on the system, check using:
dpkg --list | grep linux-image
To see the list of currently active kernel
uname -mrs
In the system below there are three kernels and the active one is the latest version

Managing automatic upgrades in GUI
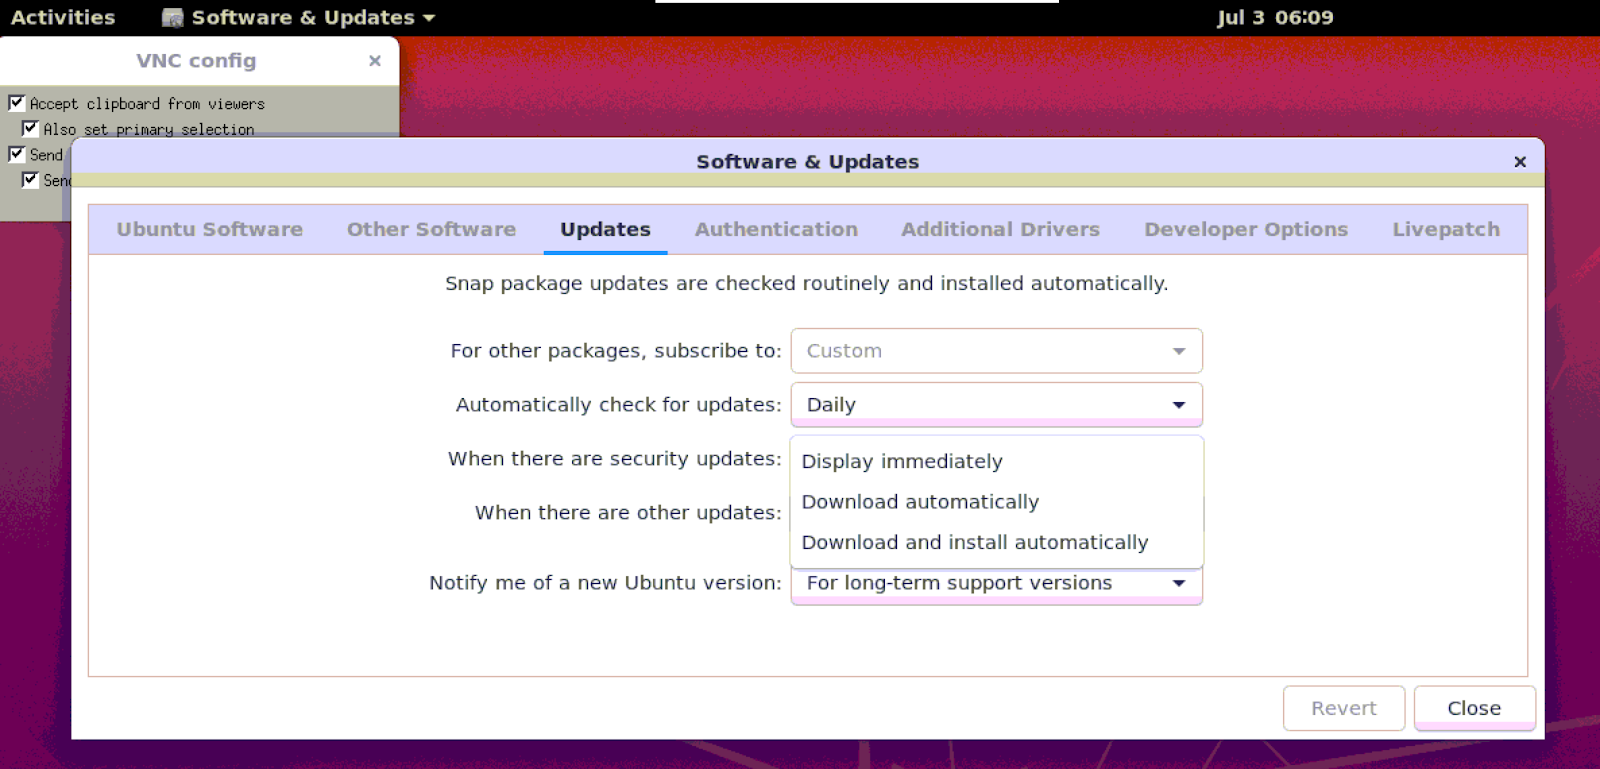
Search for the “Software & Updates” application in the GUI
Click on the Updates tab and in the option for “When there are security updates:”, from the drop down, click on the “Download and Install automatically” option.
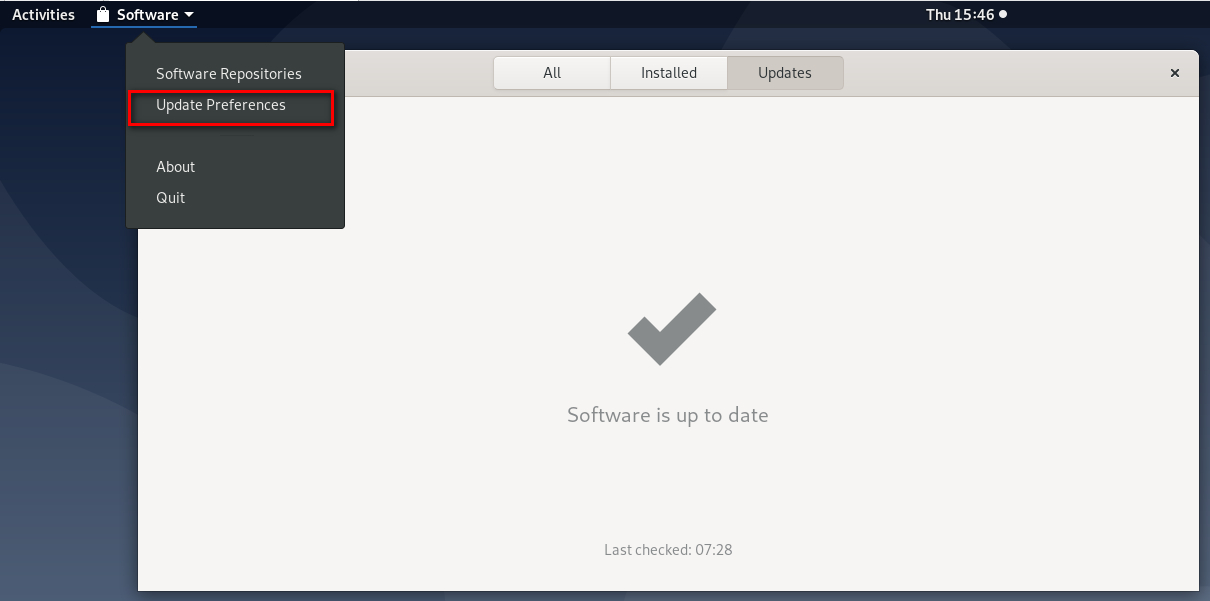
The corresponding steps in Debian are very similar:
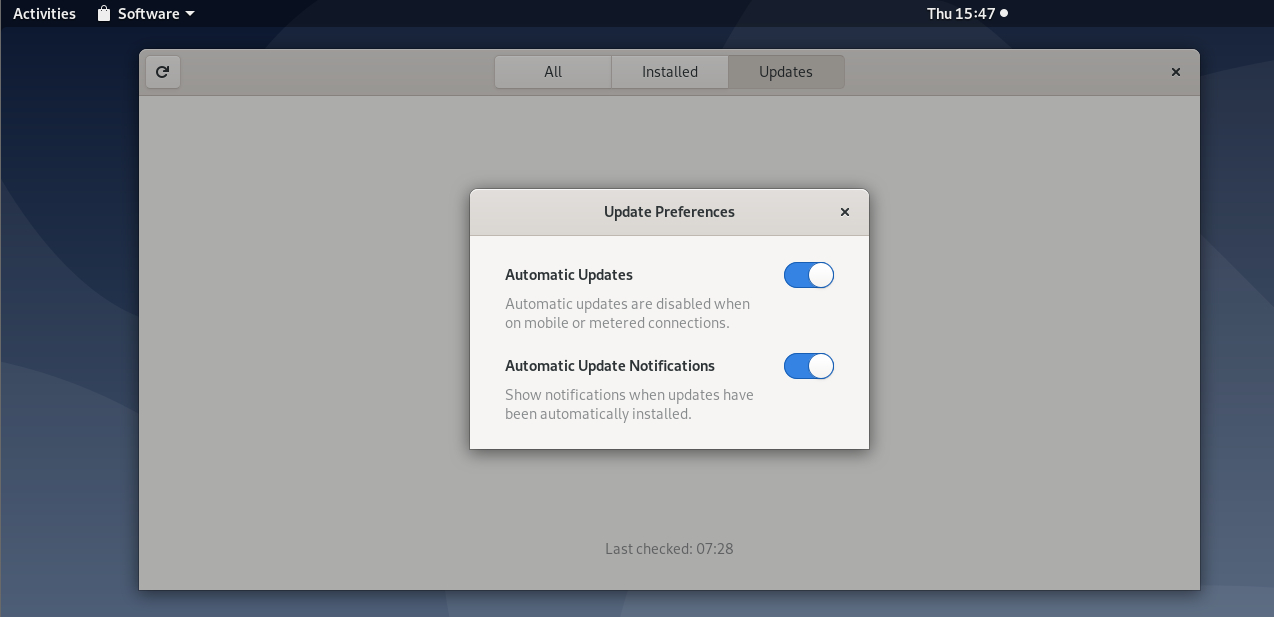
Click on Update Preferences:
And set it up for automatic upgrade using these options:
Managing automatic upgrades through scripts
Using the "unattended-upgrades" package you can set up the system for automatic upgrades including optional reboot, email notification etc. You can check for details AutomaticSecuri. Again, the above works when you have a few systems to manage. When you are talking about hundreds of systems with live running applications that cannot be afforded to be disrupted, you have to come up with a more organized custom approach with regression testing and scheduled downtimes built into your automation scripts.
Managing upgrades in the containerized world
As more organizations move towards microservices and containerization of their applications, the adoption of Ubuntu based base images for running the microservices and other containers can become a common practice. Here too, updating the OS vulnerabilities periodically becomes imperative. The easiest way to handle this is to have a line of code, that does the upgrades, in the Dockerfile of your service. This way every time your Docker image gets built; it is automatically up to date with the latest OS packages.
|
# full-upgrade' -> the function of upgrade is to install the newest versions of all packages, also intelligently handles changing dependencies with new versions of packages |
|
|
# 'autoremove' -> Remove packages that were automatically installed to satisfy dependencies for some packages that are no longer needed. |
|
|
# 'autoclean' -> Clears out the local repository of retrieved package files |
|
|
RUN apt update && apt full-upgrade -y && apt autoremove -y && apt autoclean -y |
This same combination command can be used for automation on server systems.
Managing vulnerabilities that cannot be remediated through upgrade
Sometimes, you can run into situations when the packages do not get upgraded through any of these usual methods and yet your system is left vulnerable. (This can only get caught when you run vulnerability scans against the system). One such example would be when there are no more new versions available on the package, when the OS version has reached EOS/EOL. In such a case, you have to upgrade to the latest OS version and if you need to buy time, another option would be to manually remove that package and install an alternative, if required.
Conclusion
A typical application environment, whether a cloud or on-prem model, contains 100s or even 1000s of systems that need to be kept up to date with respect to operating system patches. Self-aware organizations should ensure that their security policies mandate timely application of patches that get released periodically from vendors. Keeping OS packages upgraded not only improves your security posture but will also improve the stability and performance of the system. This will take you one step closer to staying compliant to various regulatory certifications like HIPAA, GDPR, SOC2, ISO and so on. And finally, that makes your customers happy!
About the Authors
Mrudula Madiraju
 Mrudula Madiraju's technical career spans across multiple technologies, domains, customers, services and products. In her current role, she manages the Security Controls and Compliance of the Spark based Analytics Engine service on IBM Cloud. Whenever time permits, she loves to learn and share tidbits of epiphanies through sessions and writings. Connect with her on LinkedIn.
 Chetan Bhatia
Chetan Bhatia is a seasoned DevSecurityOps consultant. He is an avid problem solver, and is skilled in Python, Unix scripting, Jenkins andTekton. Chetan is great at handling crisis situations, and never has to repeat a job more than once. “Automation Automation Automation” is his mantra. He currently leads the DevOps CI/CD pipeline development for the Spark based Analytics Engine service on IBM Cloud. Connect with Chetan on LinkedIn.


